04.好客租房_搭建自己的图床,接入swagger-ui,新增房源列表接口编写
4. 好客租房------基础设施搭建, 新增接口查看房源列表[项目必需]
在本章节里, 将会带你使用ngnix搭建本地图床, 项目增加swagger-ui接口(选学即可, 直接用swagger测试比较方便和直观), 最后我们在新建一个房源列表接口, 并使用swagger进行测试.
4.1 图床服务的搭建
4.1.1 图床服务简单介绍
在新增房源中,需要上传图片,其实,不只是新增房源,在整个项目中上传图片的需求有很多的,所以,我们需要
开发一个上传图片的服务,来提供服务。
开发一个图片上传服务,需要有存储的支持,那么我们的解决方案将以下几种:
-
直接将图片保存到服务的硬盘
- 优点:开发便捷,成本低
- 缺点:扩容困难
-
使用分布式文件系统进行存储
- 优点:容易实现扩容
- 缺点:开发复杂度稍大(尤其是开发复杂的功能)
-
使用nfs做存储
- 优点:开发较为便捷
- 缺点:需要有一定的运维知识进行部署和维护
-
使用第三方的存储服务
- 优点:开发简单,拥有强大功能,免维护
- 缺点:付费
在本套课程中采用第一解决方案, 如果需要其他解决方案可以自行百度, 都是属于很简单的内容.
4.1.2 完成上传文件的接口
因为需求比较简单,我们直接在api-server接口中实现掉.
先实现Service层
package cn.itcast.haoke.dubbo.api.service;

import cn.itcast.haoke.dubbo.server.vo.PicUploadResult;
import org.apache.commons.lang3.RandomUtils;
import org.joda.time.DateTime;
import org.apache.commons.lang3.StringUtils;
import org.springframework.stereotype.Service;
import org.springframework.web.multipart.MultipartFile;

import java.io.File;
import java.io.IOException;
import java.util.Date;

/**
 * 图片上传服务
 *
 * @author 过道
 */
@Service
public class PicUploadService {
    private static final String[] IMAGE_TYPE = new String[]{".bmp", ".jpg", ".jpeg", ".gif", ".png"};
    // 我用的是linux的目录结构 , Windows直接参考注释掉的内容即可
    static final String BASE_FOLDER = "/test/img";
//    static final String BASE_FOLDER = "E:\\1016";
    public PicUploadResult upload(MultipartFile uploadFile) {
        boolean isLegal = false;
        for (String type : IMAGE_TYPE) {
            if (StringUtils.endsWithIgnoreCase(uploadFile.getOriginalFilename(), type)) {
                isLegal = true;
                break;
            }
        }

        PicUploadResult picUploadResult = new PicUploadResult();

        if (!isLegal) {
            picUploadResult.setStatus("error");
            return picUploadResult;
        }

        String fileName = uploadFile.getOriginalFilename();
        String filePath = getFilePath(fileName);

        String picUrl = StringUtils.replace(
                StringUtils.substringAfterLast(filePath, BASE_FOLDER), "\\", "/");
        // 记得替换IP为你的服务器ip,或者本机IP
        picUploadResult.setName("http://${你得IP}:10000" + picUrl);

        File newFile = new File(filePath);

        try {
            uploadFile.transferTo(newFile);
        } catch (IOException e) {
            e.printStackTrace();
            picUploadResult.setStatus("error");
            return picUploadResult;
        }

        picUploadResult.setStatus("done");
        picUploadResult.setUid(String.valueOf(System.currentTimeMillis()));

        return picUploadResult;


    }

	/**
     * 根据时间戳生成文件路径
     * 文件路径规则 : 按照时间戳划分目录层级:yyyy/MM/DD/yyyyMMDDmmssSSSS.后缀
     * 比如 : 2022/10/15/202210151220008380755.jpg
     */
    private String getFilePath(String rawFileName) {
        String baseFolder = BASE_FOLDER + File.separator + "images";
        Date nowDate = new Date();
        String fileFolder = baseFolder + File.separator + new DateTime(nowDate).toString("yyyy")
                + File.separator + new DateTime(nowDate).toString("MM")
                + File.separator + new DateTime(nowDate).toString("dd");
        File file = new File(fileFolder);
        if (!file.isDirectory()) {
            boolean mkdirs = file.mkdirs();
            if (!mkdirs) {
                System.out.println(rawFileName + "创建目录失败");
            }
        }
        String result = new DateTime(nowDate).toString("yyyyMMddhhmmssSSSS")
                + RandomUtils.nextInt(100, 999) + "."
                + StringUtils.substringAfterLast(rawFileName, ".");
        return fileFolder + File.separator + result;
    }
}
接着实现controller层
package cn.itcast.haoke.dubbo.api.controller;

import cn.itcast.haoke.dubbo.api.service.PicUploadService;
import cn.itcast.haoke.dubbo.server.vo.PicUploadResult;
import org.springframework.beans.factory.annotation.Autowired;
import org.springframework.web.bind.annotation.*;
import org.springframework.web.multipart.MultipartFile;

/**
 * 图片上传服务
 *
 * @author 过道
 */
@RequestMapping("/pic/upload")
@RestController
public class PicUploadController {
    @Autowired
    private PicUploadService picUploadService;

    @PostMapping
    @ResponseBody
    public PicUploadResult upload(@RequestParam("file")MultipartFile uploadFile) {
        return picUploadService.upload(uploadFile);
    }
}
首先,我们先写一个单元测试跑一下效果.
package cn.itcast.haoke.dubbo.api.service;

import junit.framework.TestCase;
import org.junit.Test;
import org.junit.runner.RunWith;
import org.springframework.beans.factory.annotation.Autowired;
import org.springframework.boot.test.context.SpringBootTest;
import org.springframework.mock.web.MockMultipartFile;
import org.springframework.test.context.junit4.SpringRunner;
import org.springframework.web.multipart.MultipartFile;

@RunWith(SpringRunner.class)
@SpringBootTest
public class PicUploadServiceTest extends TestCase {
    @Autowired
    private PicUploadService uploadService;

    @Test
    public void testUpload() {
        MultipartFile multipartFile = new MockMultipartFile("a.jpg", "a.jpg", "", new byte[]{'1', '2'});
        PicUploadResult upload = uploadService.upload(multipartFile);
        System.out.println(upload);
        // 我在上传service中加入了一些自定义信息,如果你测试失败, 就需要看看那些自定义信息有没有换成你自己的信息, 比如IP, 目录等.
    }
}
运行效果如下
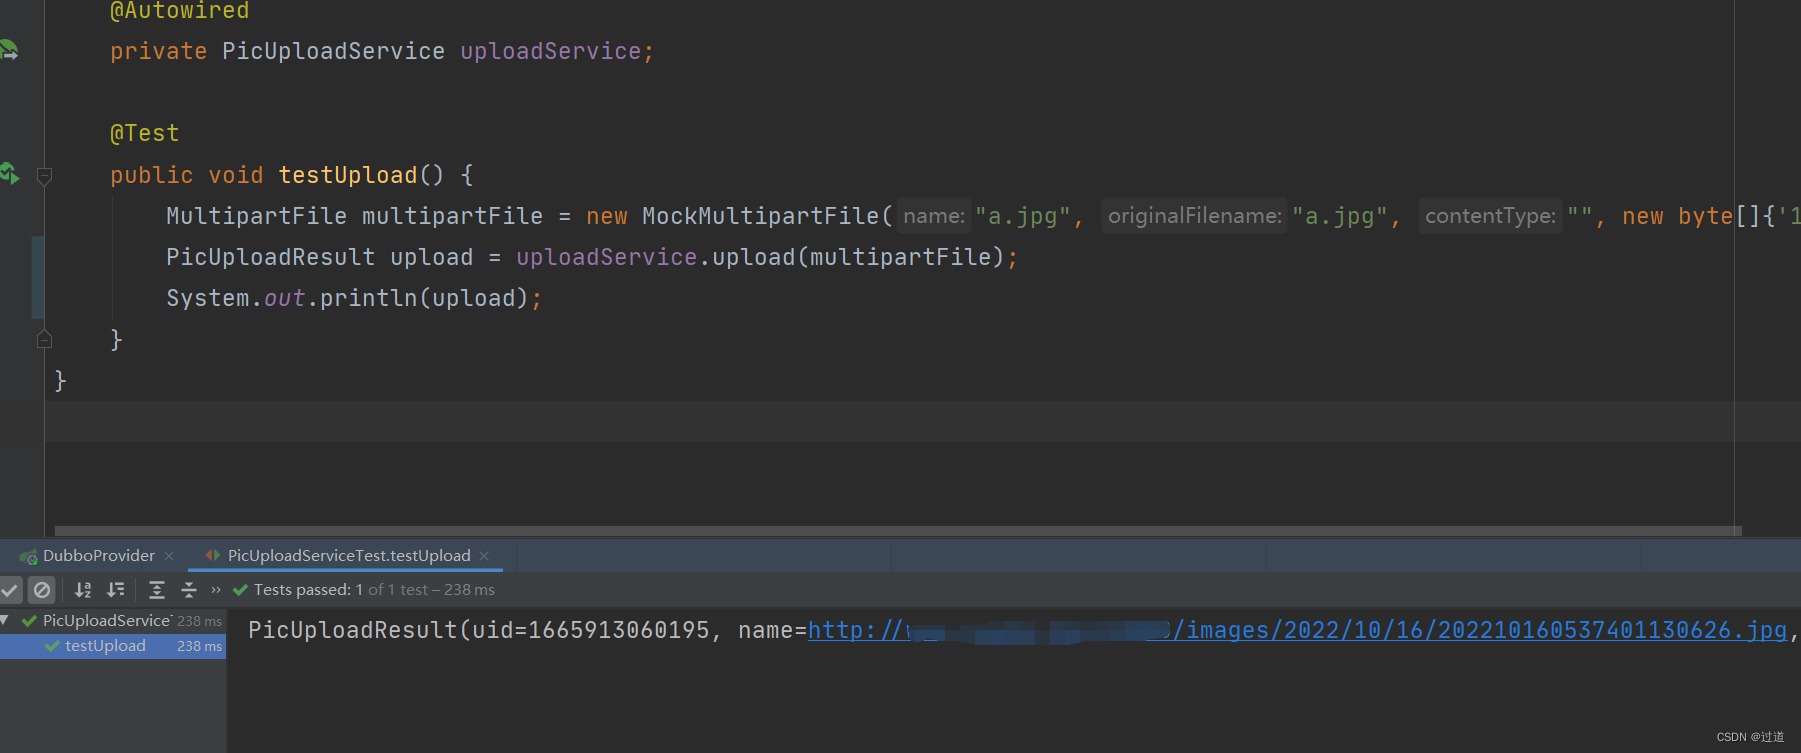
然后打开对应目录查看文件是否已经存在即可.
4.1.3 搭建 ngnix 服务器
我这里使用的是CentoOS服务器搭建ngnix服务器了, 我这边直接引用一篇搭建ngnix的文章给读者, windows的直接搜索后回到这里就ok了,
4.1.3.1 安装ngnix软件
1,依赖文件安装
1)gcc安装
nginx编译依赖gcc环境,安装命令:
yum install -y gcc
2)pcre安装
pcre是一个Perl库,nginx的http模块使用pcre来解析正则表达式,安装命令:
yum install -y pcre pcre-devel
3)zlib安装
zlib库提供很多种压缩和解压缩方式,nginx使用zlib对http包的内容进行gzip,安装命令:
yum install -y zlib zlib-devel
4)openssl安装
openssl是安全套接字层密码库,囊括主要的密码算法、常用密钥和证书封装管理功能及SSL协议,并提供丰富的应用程序供测试或其它目的使用。nginx不仅支持http协议,还支持https(即在ssl协议上传输http),安装命令:
yum install -y openssl openssl-devel
2,nginx安装
1)下载nginx安装文件
进入/usr/local目录,执行以下命令:
wget http://nginx.org/download/nginx-1.20.1.tar.gz
2)解压nginx安装文件
tar -zxvf nginx-1.20.1.tar.gz
3)配置configure
进入/usr/local/nginx-1.20.1目录,执行如下命令:
./configure --prefix=/usr/local/nginx
4)编译并安装
进入/usr/local/nginx-1.20.1目录,执行如下命令:
make && make install
5)nginx.conf文件配置
进入/usr/local/nginx/conf,执行以下命令:
vim nginx.conf
6)启动nginx
进入/usr/local/nginx/sbin目录,执行以下命令:
./nginx
4.1.3.2 支持文件访问
使用vim /usr/local/nginx-{版本号}/nginx.conf 修改配置文件如下, 如果不愿意改动原有server, 则直接在server同级下新建一个即可, 还有记得修改listen 的端口号为10000
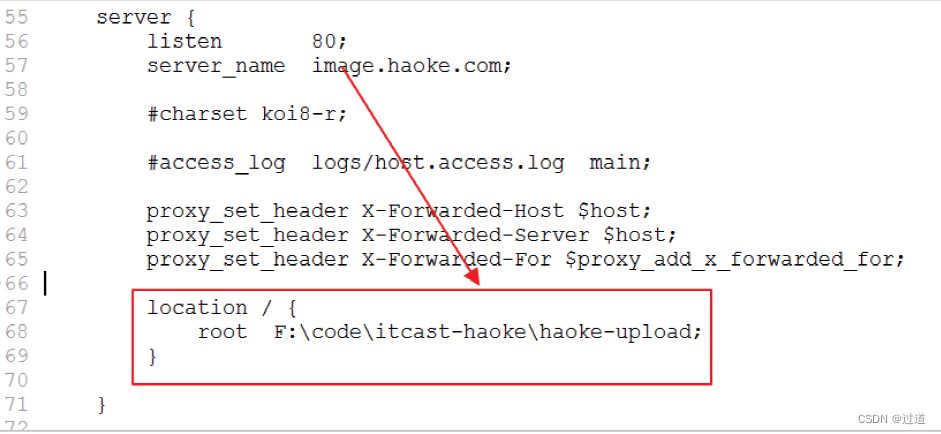
然后在网页里访问单测返回的url, 比如我的是
http://127.0.0.1:10000/images/2022/10/16/202210160537401130626.jpg
效果图如下:
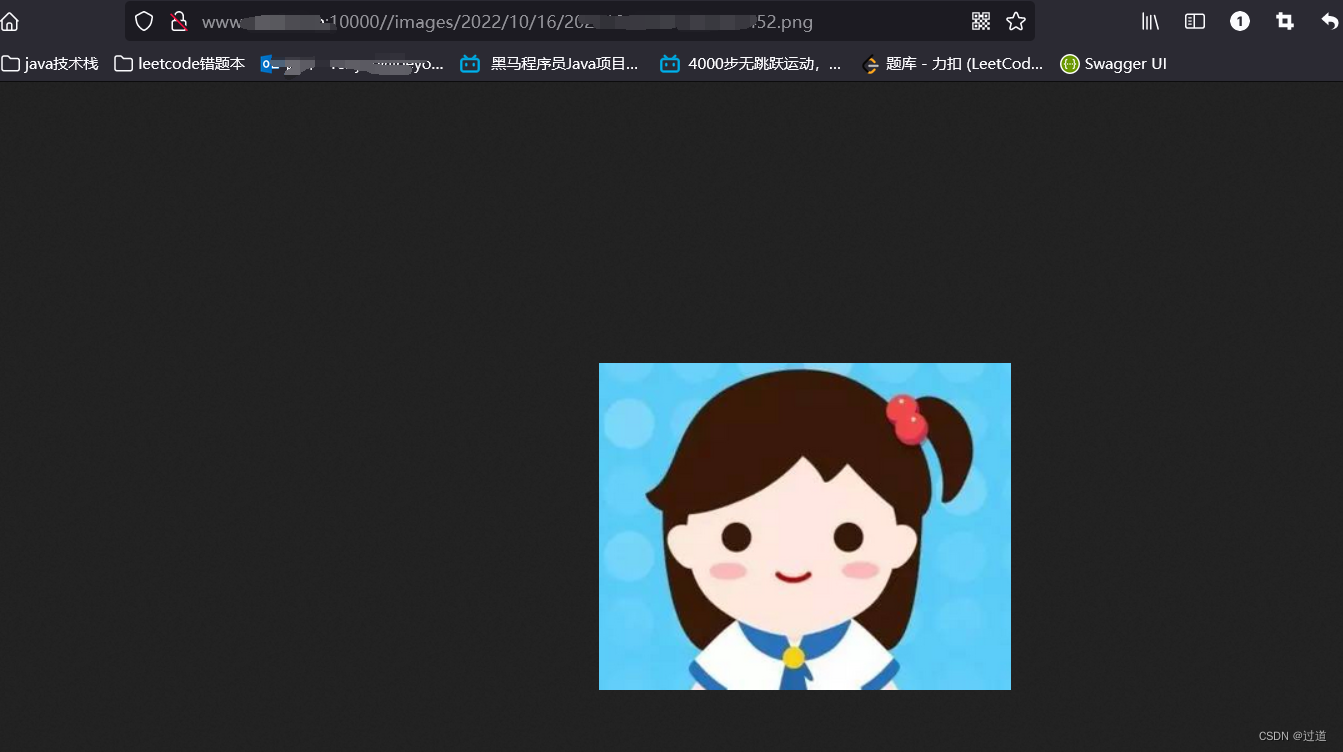
这样我们的图床服务就搭建完毕了.
4.2 swagger-ui的接入.
swagger-ui是一个前后端交互的网页版文档, 效果如图所示:
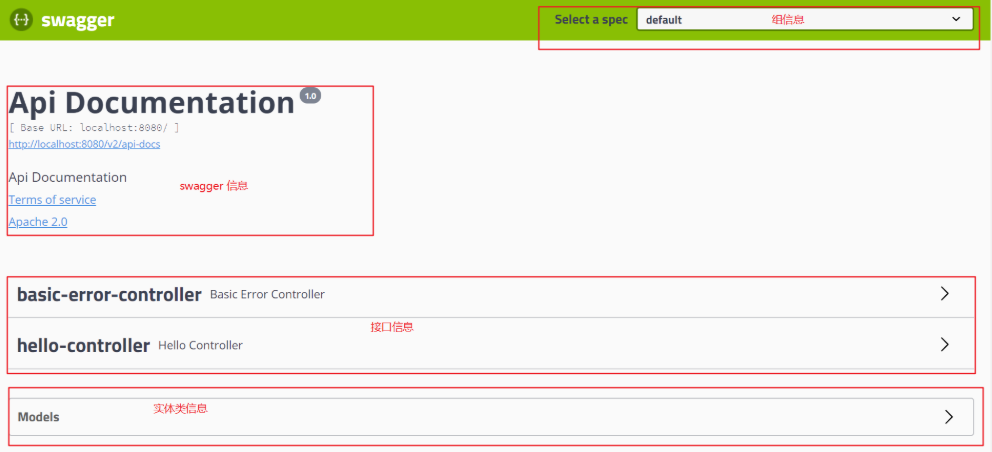
我们可以在图中看到一个接口列表, 程序员可以使用这个网页测试Controller接口, 类似前端使用的postman.
话不多说, 直接构建, 构建出效果, 大家就知道怎么用了.
4.2.1 api-server项目搭建swagger-ui
本次变更内容列表如下图[properties是我不小心加上去的, 无视即可]

打开api-server项目, 在pom的 增加如下依赖
        <!--swagger-ui -->
        <dependency>
            <groupId>io.springfox</groupId>
            <artifactId>springfox-swagger-ui</artifactId>
            <version>2.9.2</version>
        </dependency>
        <!--springfox-swagger2 -->
        <dependency>
            <groupId>io.springfox</groupId>
            <artifactId>springfox-swagger2</artifactId>
            <version>2.9.2</version>
        </dependency>
然后新建一个SwaggerConfig类即可:
package cn.itcast.haoke.dubbo.api.config;

import org.springframework.context.annotation.Bean;
import org.springframework.context.annotation.Configuration;
import org.springframework.core.env.Environment;
import org.springframework.core.env.Profiles;
import springfox.documentation.builders.RequestHandlerSelectors;
import springfox.documentation.service.ApiInfo;
import springfox.documentation.service.Contact;
import springfox.documentation.spi.DocumentationType;
import springfox.documentation.spring.web.plugins.Docket;
import springfox.documentation.swagger2.annotations.EnableSwagger2;

import java.util.ArrayList;

@Configuration //配置类
@EnableSwagger2  //开启swagger2自动配置
public class SwaggerConfig {
    //访问地址:http://localhost:18080/swagger-ui.html
    //配置了swagger2的Docket的bean实例
    @Bean
    public Docket docket(Environment environment) {

        //设置要显示的Swagger环境
        Profiles profiles = Profiles.of("dev", "test");
        //获取项目的环境  通过environment.acceptsProfiles判断是否处在注解设定的环境中
        boolean flag = environment.acceptsProfiles(profiles);

        return new Docket(DocumentationType.SWAGGER_2)  //链式编程
                .apiInfo(apiInfo())
                .groupName("好客租房")
                .enable(flag)   //是否开启swagger,默认为开启
                .select()
                //RequestHandlerSelectors配置要扫描接口的方式
                //basePackage("com.rql.controller"):指定要扫描的包,any():扫描全部,none()什么都不扫描
                //withClassAnnotation(RestController.class)://扫描类上的注解
                //withMethodAnnotation(GetMapping.class): 扫描方法上的注解
                .apis(RequestHandlerSelectors.basePackage("cn.itcast.haoke.dubbo.api.controller"))
                //.paths 过滤什么路径
                // .paths(PathSelectors.ant("/rql/**"))
                .build();

    }

    // 如何配置多个分组?配置多个分组只需要配置多个docket即可
    @Bean
    public Docket docket1() {
        return new Docket(DocumentationType.SWAGGER_2)  //链式编程
                .apiInfo(apiInfo())
                .enable(true)   //是否开启swagger,默认为开启
                .select()
                //RequestHandlerSelectors配置要扫描接口的方式
                //basePackage("com.rql.controller"):指定要扫描的包,any():扫描全部,none()什么都不扫描
                //withClassAnnotation(RestController.class)://扫描类上的注解
                //withMethodAnnotation(GetMapping.class): 扫描方法上的注解
                .apis(RequestHandlerSelectors.basePackage("cn.itcast.haoke.dubbo.api.controller"))
                //.paths 过滤什么路径
                // .paths(PathSelectors.ant("/rql/**"))
                .build();
    }


    //配置swagger信息
    private ApiInfo apiInfo() {
        //作者信息
        Contact contact = new Contact("誓言唯美", "http://127.0.0.1/", "123456@qq.com");
        return new ApiInfo(
                "RQL的API接口日志",
                "好客租房",
                "1.0", "http://127.0.0.1/",
                contact,
                "Apache 2.0",
                "http://www.apache.org/licenses/LICENSE-2.0",
                new ArrayList()
        );
    }
}
4.2.2 使用swagger测试上传图片服务
然后启动api-server项目, 在浏览器输入http://{你的ip}:{项目端口}/swagger-ui.html

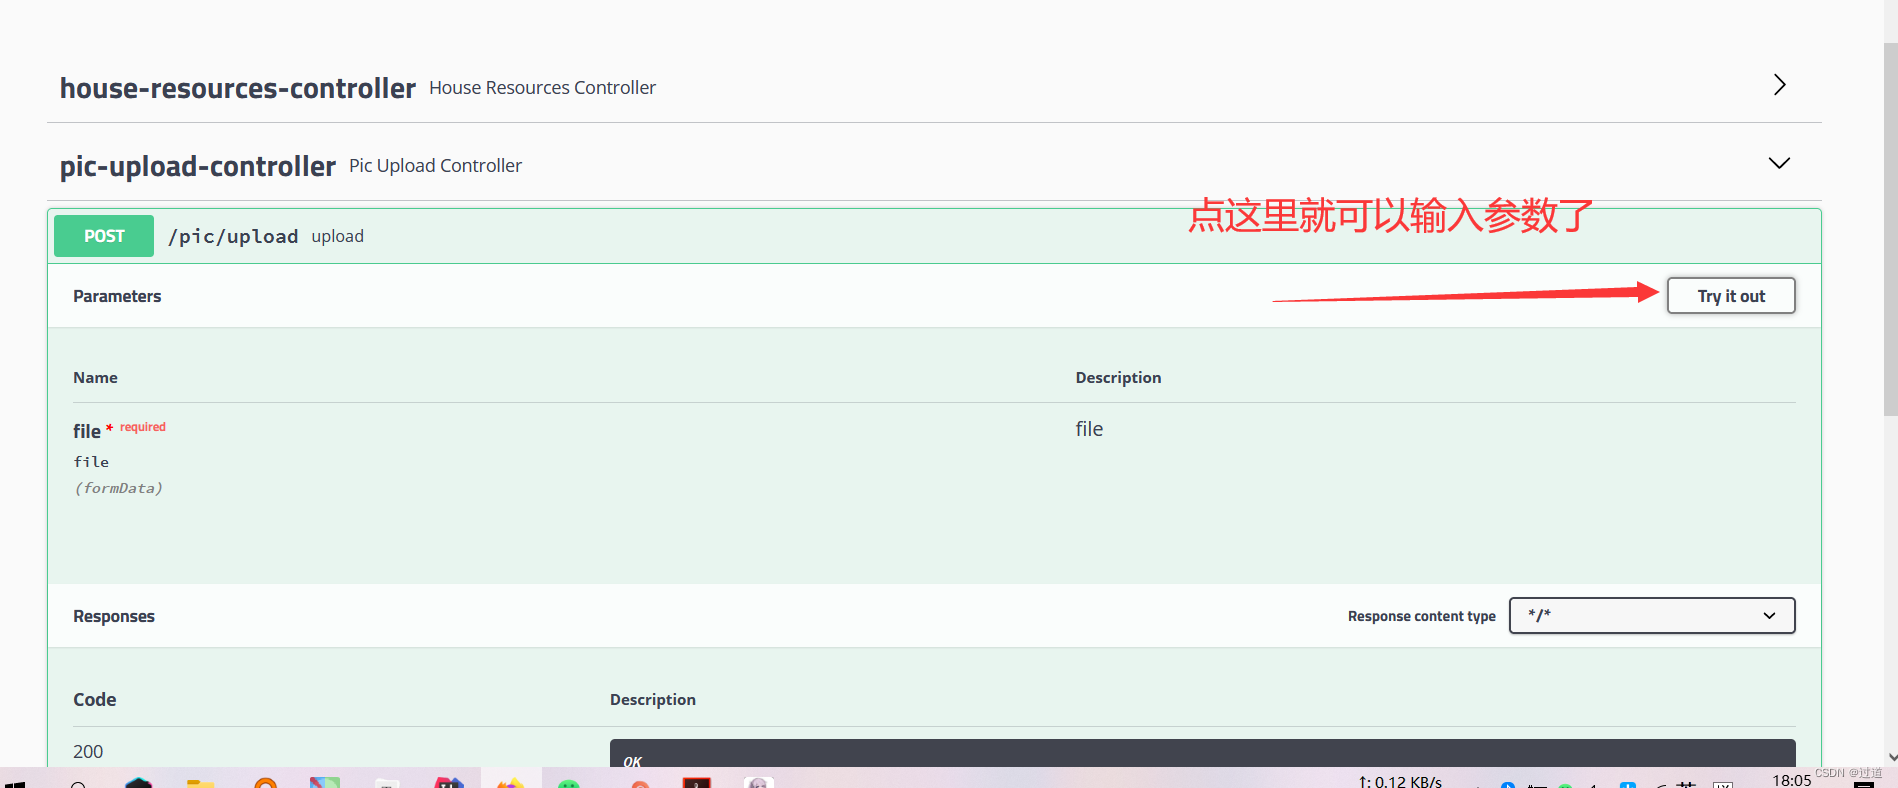
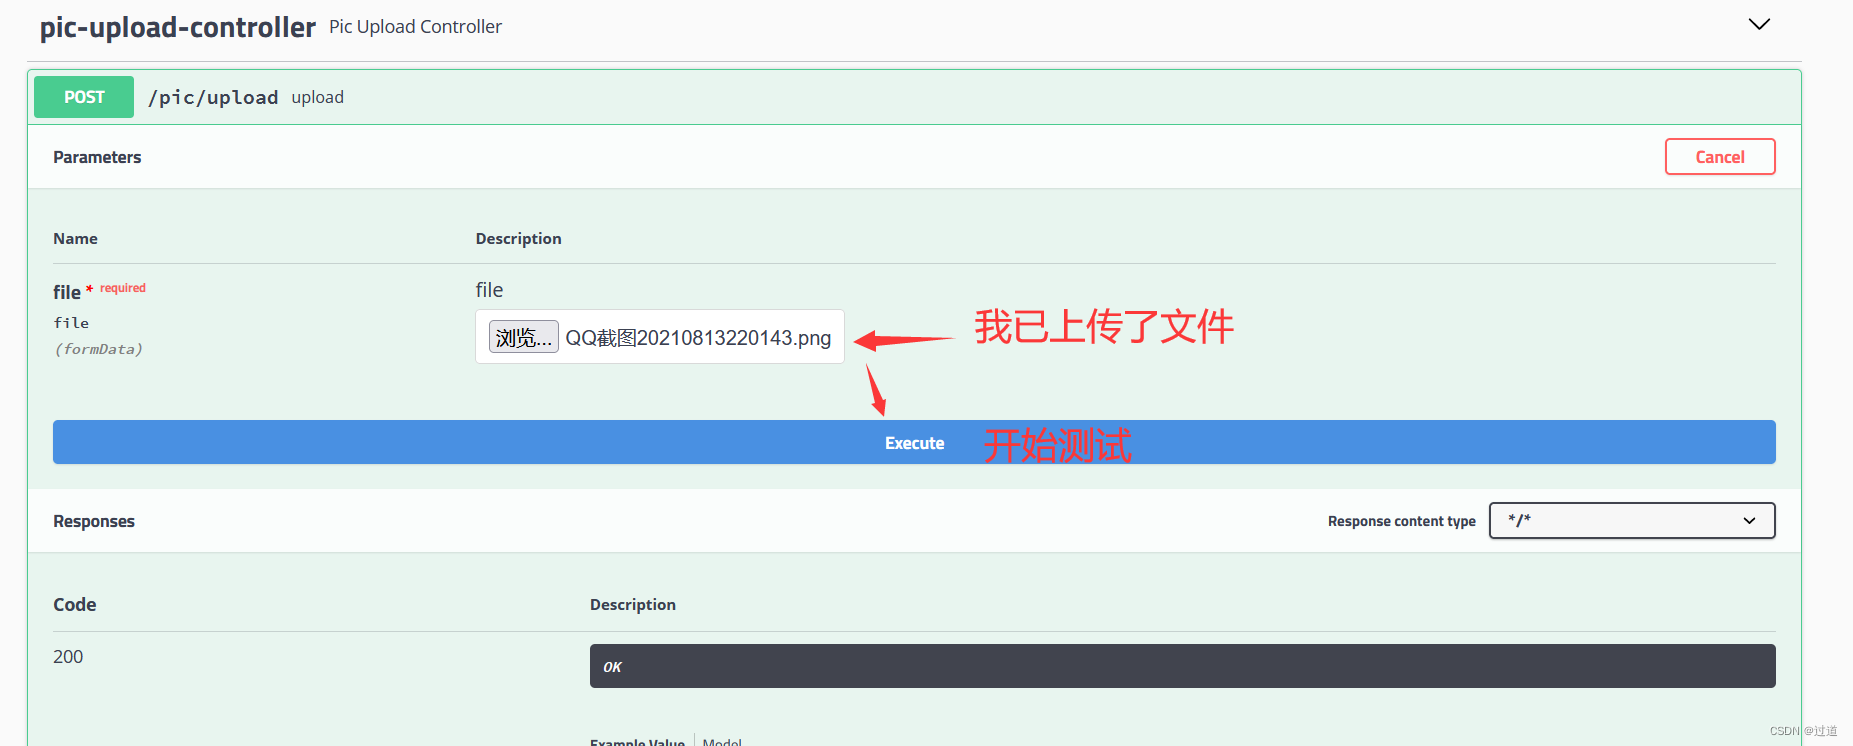
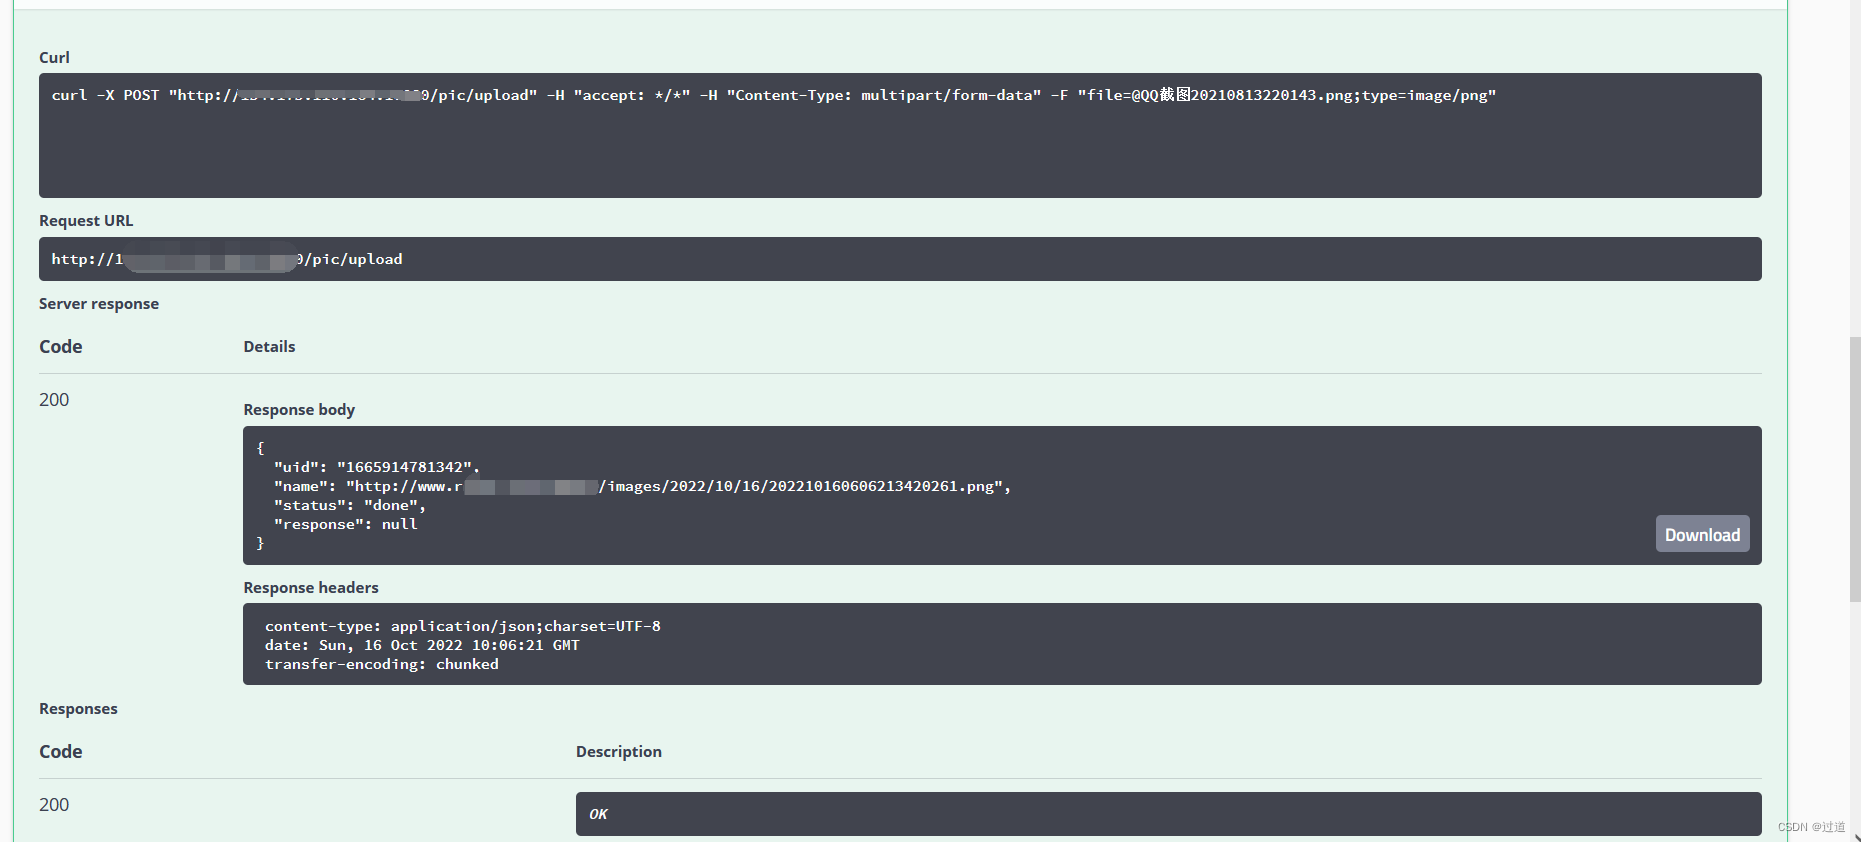
之后我们不仅可以用junit测试service的逻辑, 还可以使用swagger-ui测试Controller里的相关内容.
4.2 新增房源列表接口
4.2.1 具体代码编写
这次我们直接从上向下写(Controller->Service->Api(Dubbo)->Service-Mapper).
package cn.itcast.haoke.dubbo.api.controller;

import cn.itcast.haoke.dubbo.api.service.HouseResourcesService;
import cn.itcast.haoke.dubbo.server.pojo.HouseResources;
import cn.itcast.haoke.dubbo.api.vo.TableResult;
import org.springframework.beans.factory.annotation.Autowired;
import org.springframework.http.HttpStatus;
import org.springframework.http.ResponseEntity;
import org.springframework.web.bind.annotation.*;

/**
 * 房源管理
 *
 * @author 过道
 */
@RestController
@RequestMapping("/house/resources")
public class HouseResourcesController {

    @Autowired
    private HouseResourcesService houseResourcesService;

    /**
     * 新增房源
     *
     * @param houseResources json数据
     * @return
     */
    @PostMapping
    @ResponseBody
    public ResponseEntity<Void> save(@RequestBody HouseResources houseResources) {
        try {
            boolean bool = this.houseResourcesService.save(houseResources);
            if (bool) {
                return ResponseEntity.status(HttpStatus.CREATED).build();
            }
        } catch (Exception e) {
            e.printStackTrace();
        }
        return ResponseEntity.status(HttpStatus.INTERNAL_SERVER_ERROR).build();
    }

    /**
     * 房源列表查询
     *
     * @param houseResources 房源筛选条件
     * @param currentPage    当前第几页
     * @param pageSize       每页的容量
     * @return 分页后的数据
     */
    @GetMapping
    @ResponseBody
    public ResponseEntity<TableResult> list(HouseResources houseResources,
                                            @RequestParam(name = "currentPage", defaultValue = "1") Integer currentPage,
                                            @RequestParam(name = "pageSize", defaultValue = "10") Integer pageSize
    ) {
        return ResponseEntity.ok(houseResourcesService.queryList(houseResources, currentPage, pageSize));
    }

}
这里我们使用我们自定义的TableResult对象, 也是放在api-server模块下, 对象如下:
package cn.itcast.haoke.dubbo.api.vo;

import lombok.AllArgsConstructor;
import lombok.Data;

import java.util.List;

/**
 * 给前端返回的分页对象
 *
 * @author 过道
 */
@Data
@AllArgsConstructor
public class TableResult<T> {
    /**
     * 当前页面展示的列表数据
     */
    private List<T> list;

    /**
     * Table组件底部的分页相关部分的数据
     */
    private Pagination pagination;
}
Pagination 在同层目录下:
package cn.itcast.haoke.dubbo.api.vo;

import lombok.AllArgsConstructor;
import lombok.Data;

/**
 * 底部分页组件
 *
 * @author 过道
 */
@Data
@AllArgsConstructor
public class Pagination {
    /**
     * 当前页面
     */
    private Integer current;
    /**
     * 每页容量
     */
    private Integer pageSize;
    /**
     * 总页数
     */
    private Integer total;
}
然后回到HouseResourcesService里, 添加方法(之后我们只在类中写新增的代码部分,以免太长造成困惑)
package cn.itcast.haoke.dubbo.api.service;

import cn.itcast.haoke.dubbo.api.vo.Pagination;
import cn.itcast.haoke.dubbo.api.vo.TableResult;
import cn.itcast.haoke.dubbo.server.api.ApiHouseResourcesService;
import cn.itcast.haoke.dubbo.server.pojo.HouseResources;
import cn.itcast.haoke.dubbo.server.vo.PageInfo;
import com.alibaba.dubbo.config.annotation.Reference;
import org.springframework.stereotype.Service;

@Service
public class HouseResourcesService {

    // 使用dubbo版的@autowired, RPC调用对应提供方.
    @Reference(version = "1.0.0")
    private ApiHouseResourcesService apiHouseResourcesService;


    /**
     * 房源列表查询
     *
     * @param houseResources 房源筛选条件
     * @param currentPage    当前第几页
     * @param pageSize       每页的容量
     * @return 分页后的数据
     */
    public TableResult<HouseResources> queryList(HouseResources houseResources, Integer currentPage, Integer pageSize) {
        PageInfo<HouseResources> resourcesPageInfo = this.apiHouseResourcesService.queryHouseResourcesList(
                currentPage, pageSize, houseResources);

        return new TableResult<>(resourcesPageInfo.getRecords(),
                new Pagination(currentPage, pageSize, resourcesPageInfo.getTotal()));
    }
}
apiHouseReoucesService新增内容
package cn.itcast.haoke.dubbo.server.api;

import cn.itcast.haoke.dubbo.server.pojo.HouseResources;
import cn.itcast.haoke.dubbo.server.vo.PageInfo;

public interface ApiHouseResourcesService {

    /**
     * 分页查询房源列表
     *
     * @param page           第几页
     * @param pageSize       每页的容量
     * @param queryCondition 查询条件
     * @return 分页列表
     */
    PageInfo<HouseResources> queryHouseResourcesList(int page, int pageSize, HouseResources queryCondition);

}
ApiHouseResourcesServiceImpl
package cn.itcast.haoke.dubbo.server.api;

import cn.itcast.haoke.dubbo.server.pojo.HouseResources;
import cn.itcast.haoke.dubbo.server.service.IHouseResourcesService;
import cn.itcast.haoke.dubbo.server.vo.PageInfo;
import com.alibaba.dubbo.config.annotation.Service;
import org.springframework.beans.factory.annotation.Autowired;

/**
 * 实现dubbo接口, 提供对外服务的具体实现, 中转给houseResourceService.
 *
 * @author 过道
 */
// 此处必须使用dubbo的Service注解, 因为需要SpringBoot把这个类标记为dubbo服务方对外提供的服务. 也就是与我们之前用的@Reference对应.
@Service(version = "1.0.0")
public class ApiHouseResourcesServiceImpl implements ApiHouseResourcesService {

    // 此处直接使用Spring的autowired即可, 因为houseResourcesService的声明和实现同属一个模块一个包下.
    @Autowired
    private IHouseResourcesService iHouseResourcesService;

    @Override
    public PageInfo<HouseResources> queryHouseResourcesList(int page, int pageSize, HouseResources queryCondition) {
        return iHouseResourcesService.queryHouseResourcesList(page, pageSize, queryCondition);
    }
}
IHouseResourcesService的内容新增如下
package cn.itcast.haoke.dubbo.server.service;

import cn.itcast.haoke.dubbo.server.pojo.HouseResources;
import cn.itcast.haoke.dubbo.server.vo.PageInfo;

public interface IHouseResourcesService {

    /**
     * 分页查询房源列表
     *
     * @param page           第几页
     * @param pageSize       每页的容量
     * @param queryCondition 查询条件
     * @return 分页列表
     */
    PageInfo<HouseResources> queryHouseResourcesList(int page, int pageSize, HouseResources queryCondition);
}
HouseResourcesServiceImpl类新增代码如下
package cn.itcast.haoke.dubbo.server.service.impl;

import cn.itcast.haoke.dubbo.server.pojo.HouseResources;
import cn.itcast.haoke.dubbo.server.service.IHouseResourcesService;
import cn.itcast.haoke.dubbo.server.vo.PageInfo;
import com.baomidou.mybatisplus.core.conditions.query.QueryWrapper;
import com.baomidou.mybatisplus.core.metadata.IPage;
import org.apache.commons.lang3.StringUtils;
import org.springframework.stereotype.Service;
import org.springframework.transaction.annotation.Transactional;

@Transactional
@Service
public class HouseResourcesServiceImpl extends BaseServiceImpl<HouseResources> implements IHouseResourcesService {

    @Override
    public PageInfo<HouseResources> queryHouseResourcesList(int page, int pageSize, HouseResources queryCondition) {
        // 将condition转化为mybatis-plus能理解的queryWrapper
        // PS : [使用的是'装饰者设计模式', 对我们自己的pojo增强了"支持sql的where筛选功能"]
        QueryWrapper<HouseResources> queryWrapper = new QueryWrapper<>(queryCondition);
        queryWrapper.orderByDesc("updated");

        IPage<HouseResources> iPage = super.queryPageList(queryWrapper, page, pageSize);

        return new PageInfo<>((int) iPage.getTotal(), page, pageSize, iPage.getRecords());
    }
}
PageInfo类代码如下.
package cn.itcast.haoke.dubbo.server.vo;

import lombok.AllArgsConstructor;
import lombok.Data;

import java.io.Serializable;
import java.util.Collections;
import java.util.List;

/**
 * 分页返回的对象
 * @param <T>
 * @author 过道
 */
@Data
@AllArgsConstructor
public class PageInfo<T> implements Serializable {
    /**
     * 总条数
     */
    private Integer total;
    /**
     * 当前页
     */
    private Integer pageNum;
    /**
     * 一页显示的大小
     */
    private Integer pageSize;
    /**
     * 数据列表
     */
    private List<T> records = Collections.emptyList();
}
4.2.2 测试新增接口
然后我们写一个单元测试
package cn.itcast.haoke.dubbo.api.service;

import cn.itcast.haoke.dubbo.api.vo.TableResult;
import cn.itcast.haoke.dubbo.server.pojo.HouseResources;
import junit.framework.TestCase;
import org.junit.Test;
import org.junit.runner.RunWith;
import org.springframework.beans.factory.annotation.Autowired;
import org.springframework.boot.test.context.SpringBootTest;
import org.springframework.test.context.junit4.SpringRunner;

@RunWith(SpringRunner.class)
@SpringBootTest
public class HouseResourcesServiceTest extends TestCase {
    @Autowired
    private HouseResourcesService houseResourcesService;

    @Test
    public void testQueryPageList() {
        HouseResources houseResources = new HouseResources();

        TableResult<HouseResources> houseResourcesTableResult = houseResourcesService.queryList(houseResources, 1, 10);
        System.out.println(houseResourcesTableResult);
    }
}
结果: 看见绿条.
然后打开swagger-ui, 进行测试, 什么参数都不用填写, 直接执行即可.
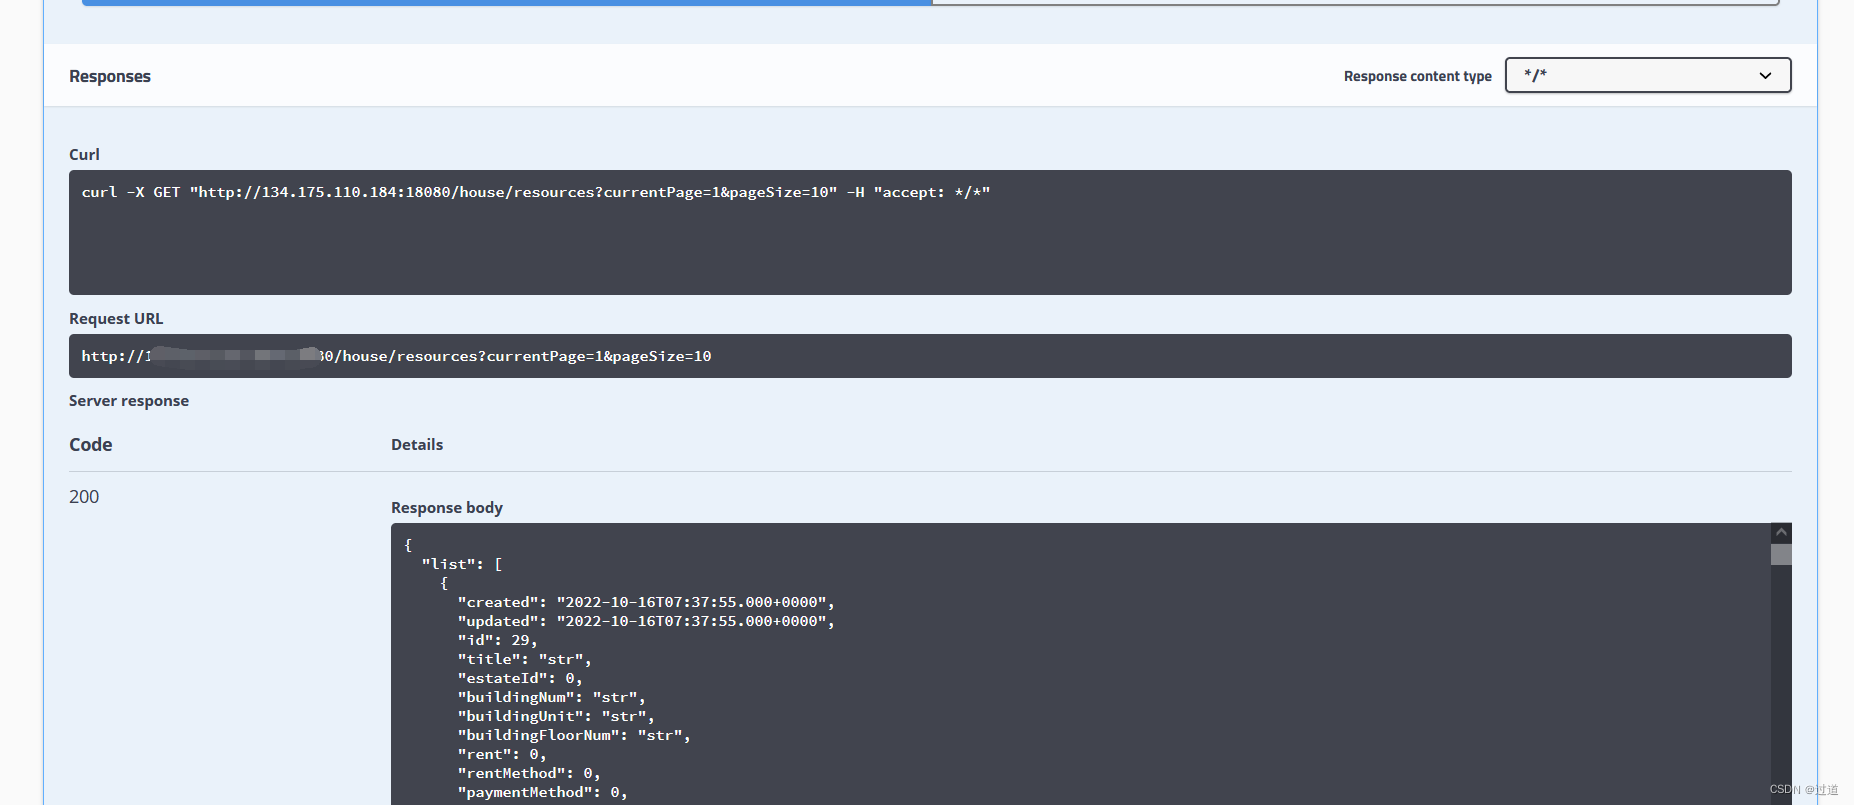
结果也是ok的.
