SpringCloud(13):分布式配置中心
1 为什么需要分布式配置中心?
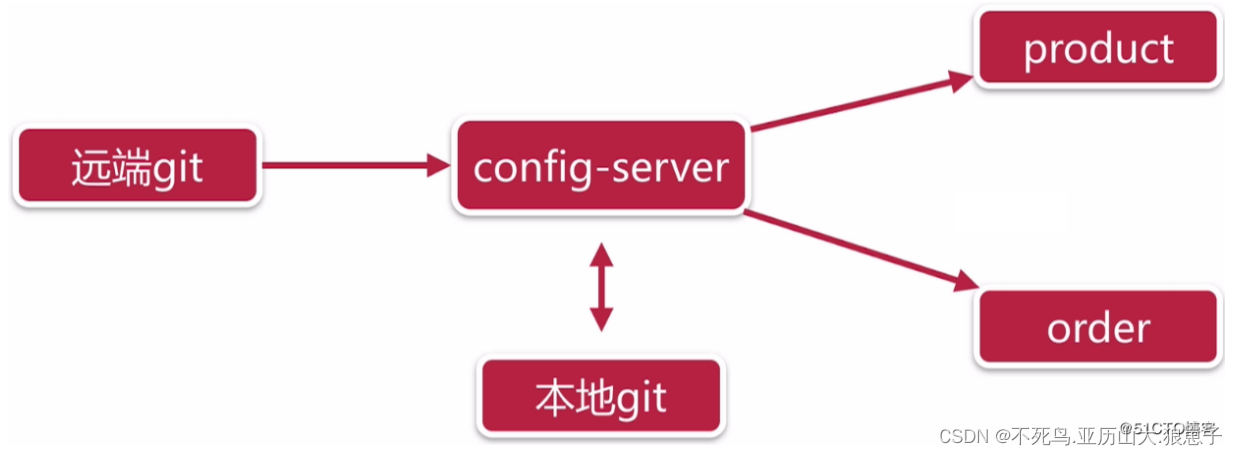
在分布式系统中,由于服务数量巨多,为了方便服务配置文件统一管理,所以需要分布式配置中心组件。在Spring Cloud中,有分布式配置中心组件spring cloud confifig ,它支持配置服务放在配置服务的内存中(即本地),也支持放在远程Git仓库中。在spring cloud confifig 组件中,分两个角色,一是config server,二是config client。
2 没有使用统一配置中心时,所存在的问题
- 配置文件分散在各个项目里,不方便维护
- 配置内容安全与权限,实际开发中,开发人员是不知道线上环境的配置的
- 更新配置后,项目需要重启
3 有哪些开源配置中心
- spring-cloud/spring-cloud-config https://github.com/spring-cloud/spring-cloud-config spring出品,可以和spring cloud无缝配合
- diamond https://github.com/takeseem/diamond
- disconf https://github.com/knightliao/disconf
- ctrip apollo https://github.com/ctripcorp/apollo/ Apollo(阿波罗)是携程框架部门研发的开源配置管理中心,具备规范的权限、流程治理等特性。
4 可用性与易用性
|
功能点
|
优先
级
|
spring-cloud-
confifig
|
ctrip
apollo
|
disconf
|
|
单点故障
| 高 |
支持
HA
部署
|
持
HA
部署
|
支持
HA
部署,高可用
zookeeper
保证
|
|
多数据中心部署
| 高 |
支持
|
支持
|
支持
|
|
配置界面
| 中 |
无,需要通过
git
操作
|
统一界面
|
统一界面
|
5 快速入门配置中心server
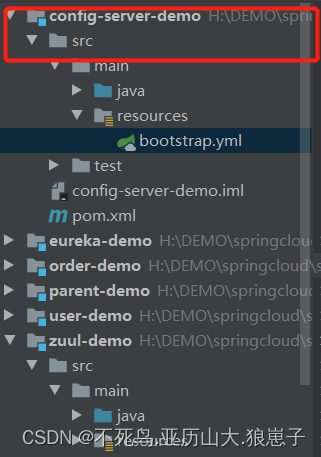
5.1 创建server-confifig模块项目
5.2 pom文件
        <!--Spring Cloud Config 服务端依赖-->
        <dependency>
            <groupId>org.springframework.cloud</groupId>
            <artifactId>spring-cloud-config-server</artifactId>
        </dependency>
5.3 创建启动类
package com.example.demo;

import org.springframework.boot.SpringApplication;
import org.springframework.boot.autoconfigure.SpringBootApplication;
import org.springframework.cloud.config.server.EnableConfigServer;

@SpringBootApplication
@EnableConfigServer
public class ConfigServerApp {
    public static void main(String[] args) {
        SpringApplication.run(ConfigServerApp.class, args);
    }
}
5.4 配置文件
server:
  port: 9102

spring:
  application:
    name: config-server-demo
  cloud:
    config:
      server:
        git:
          uri: https://gitee.com/Legendgod/config-server-demo.git
          search-paths: /**
          username: git用户名
          password: git密码
      label: master

eureka:
  client:
    service-url:
           defaultZone: http://127.0.0.1:8888/eureka
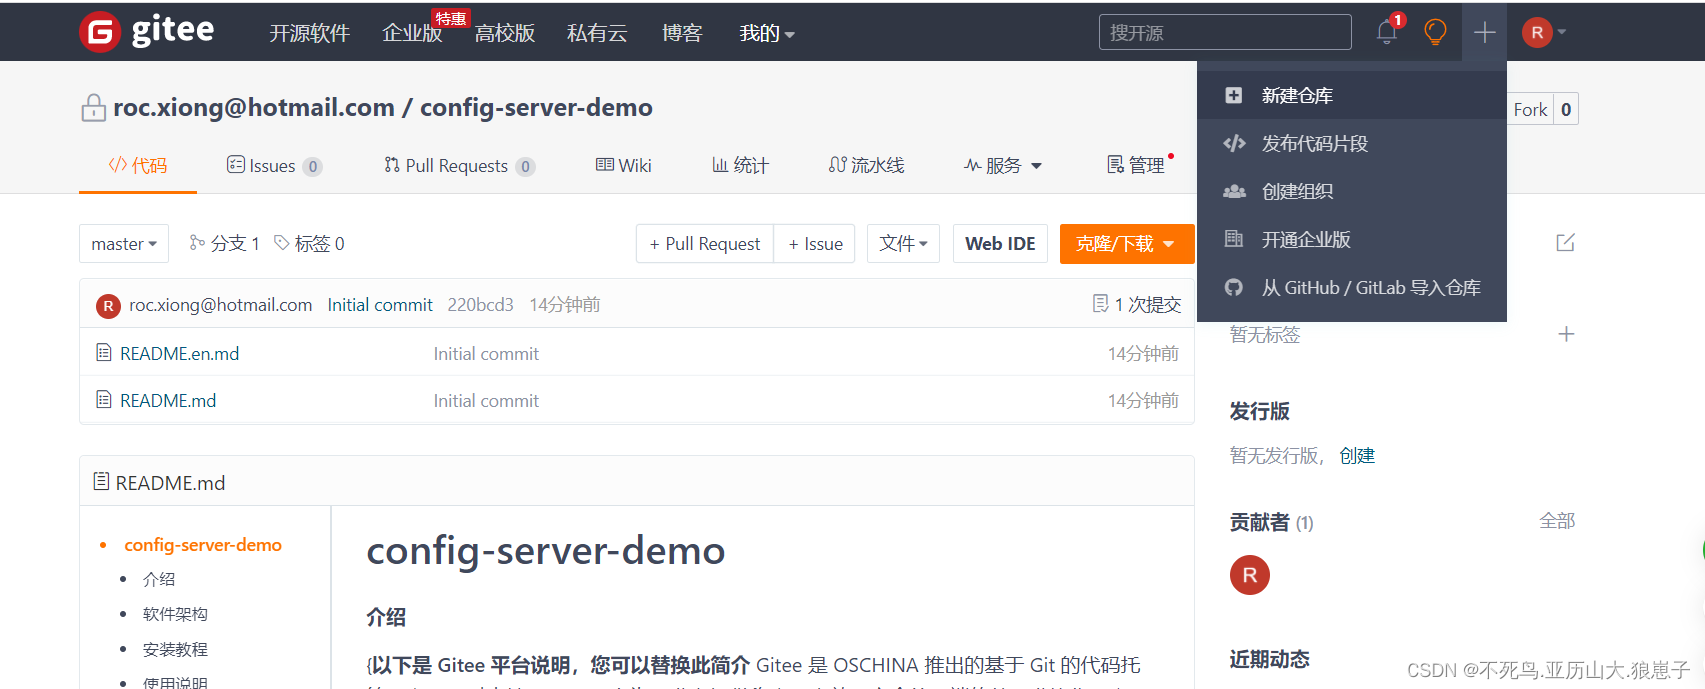
5.5 创建码云配置仓库:https://gitee.com/
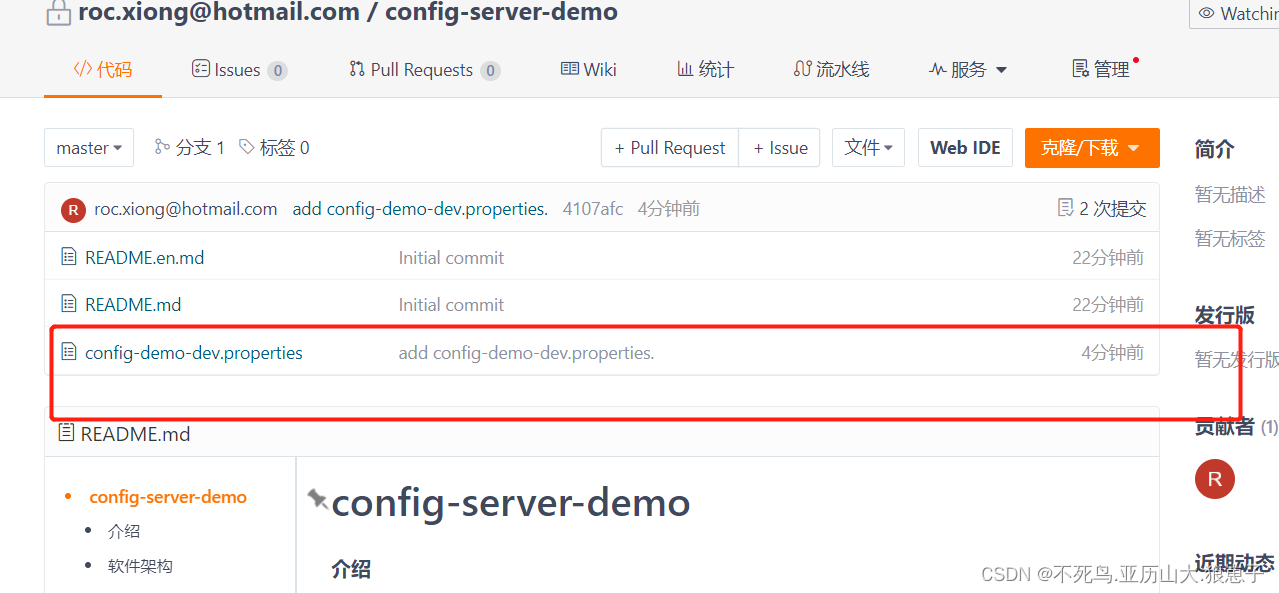
5.6 创建测试的配置文件
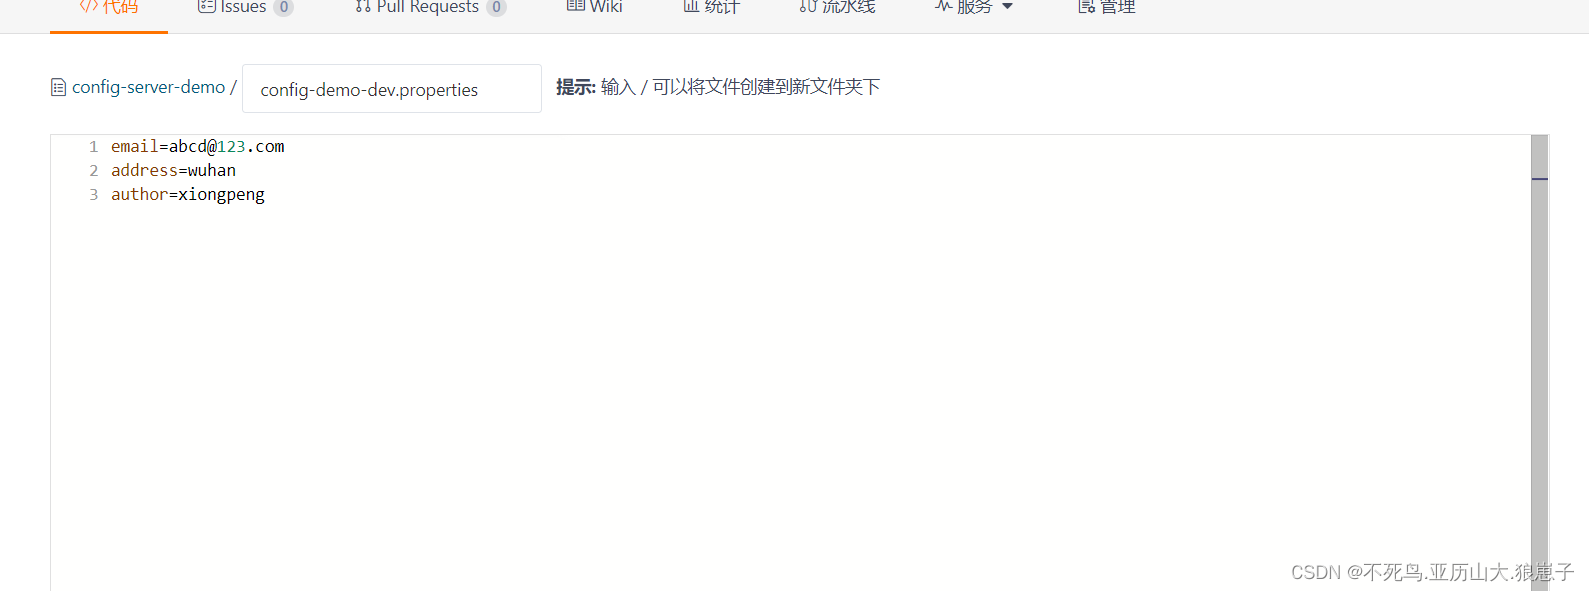
命名规则:文件名-环境名.后缀
5.7 Config支持我们使用的请求的参数规则为:
- http://地址/ { 应用名 } / { 环境名 } [ / { 分支名 } ]
http://localhost:9102/config-demo/dev

- http://地址/ { 应用名 } - { 环境名 }.yml
- http://地址/ { 应用名 } - { 环境名 }.properties
http://localhost:9102/config-demo-dev.properties
- http://地址/ { 分支名 } / { 应用名 } - { 环境名 }.yml
- http://地址/ { 分支名 } / { 应用名 } - { 环境名 }.properties
http://localhost:9102/master/config-demo-dev.properties
6 快速入门配置中心client
6.1 新建client模块
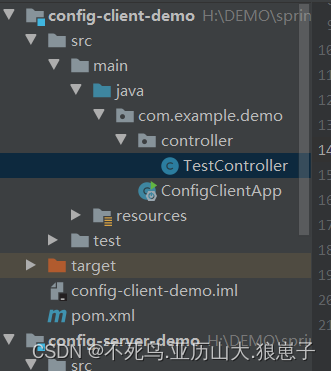
6.2 pom.xml文件
        <!--Spring Cloud Config 客户端依赖-->
        <dependency>
            <groupId>org.springframework.cloud</groupId>
            <artifactId>spring-cloud-starter-config</artifactId>
        </dependency>
        <!-- web的依赖,必须加 -->
        <dependency>
            <groupId>org.springframework.boot</groupId>
            <artifactId>spring-boot-starter-web</artifactId>
        </dependency>
6.3 新建启动类
package com.example.demo;

import org.springframework.boot.SpringApplication;
import org.springframework.boot.autoconfigure.SpringBootApplication;

@SpringBootApplication
public class ConfigClientApp {
    public static void main(String[] args) {
        SpringApplication.run(ConfigClientApp.class, args);
    }
}
6.4 测试的控制器
package com.example.demo.controller;

import org.springframework.beans.factory.annotation.Value;
import org.springframework.web.bind.annotation.GetMapping;
import org.springframework.web.bind.annotation.ResponseBody;
import org.springframework.web.bind.annotation.RestController;

@RestController
public class TestController {
    @Value("${address}")
    private String test;
    /**
     * 返回配置文件中的值
     */
    @GetMapping("/value")
    @ResponseBody
    public String returnFormValue(){
        return test;
    }
}
6.5 创建配置文件
spring:
  application:
    name: config-demo #指定了配置文件的应用名
  cloud:
    config:
      uri: http://localhost:9102/ #Config server的uri
      profile: dev #指定的环境
      label: master #指定分支
server:
  port: 9201
测试结果
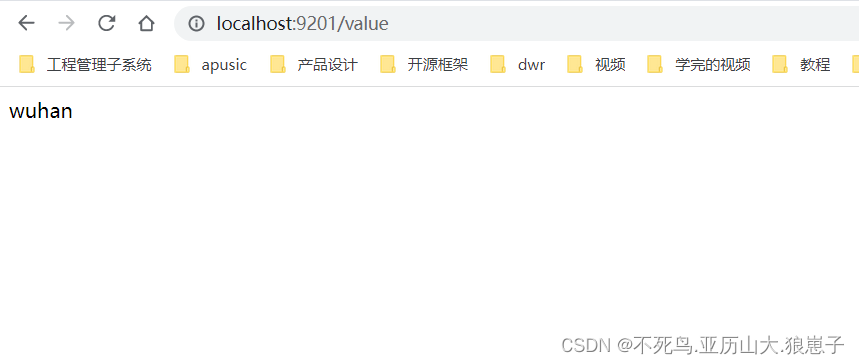
拿到了配置文件的值
