TensorFlow性能分析调研
文章目录
- 背景:
- 一、tensorflow的训练模式
- 2.2.1 with tf.profiler.experimental.Profile('logdir',options=options):
背景:
进行性能分析的过程中,不可避免地在训练的过程中加入相关语句,以输出相应的日志文档,方便后续的性能分析。tensorflow不同于pytorch ,在pytorch中,使用profiling性能分析相对比较简单(详见pytorch的性能分析)。 tensorflow相对比较复杂,各种api不同,使用的方法也不同,通过调研和实验,得到如下的调研结果。
备注:
本次调研使用了UNet和mask_rcnn来做实验,两个网络使用了不同的训练方式,适合做调研。
一、tensorflow的训练模式
目前比较常见的网络训练方式有 model.fit() 和 estimator.train()的方式。
model.fit() ( UNet网络 )

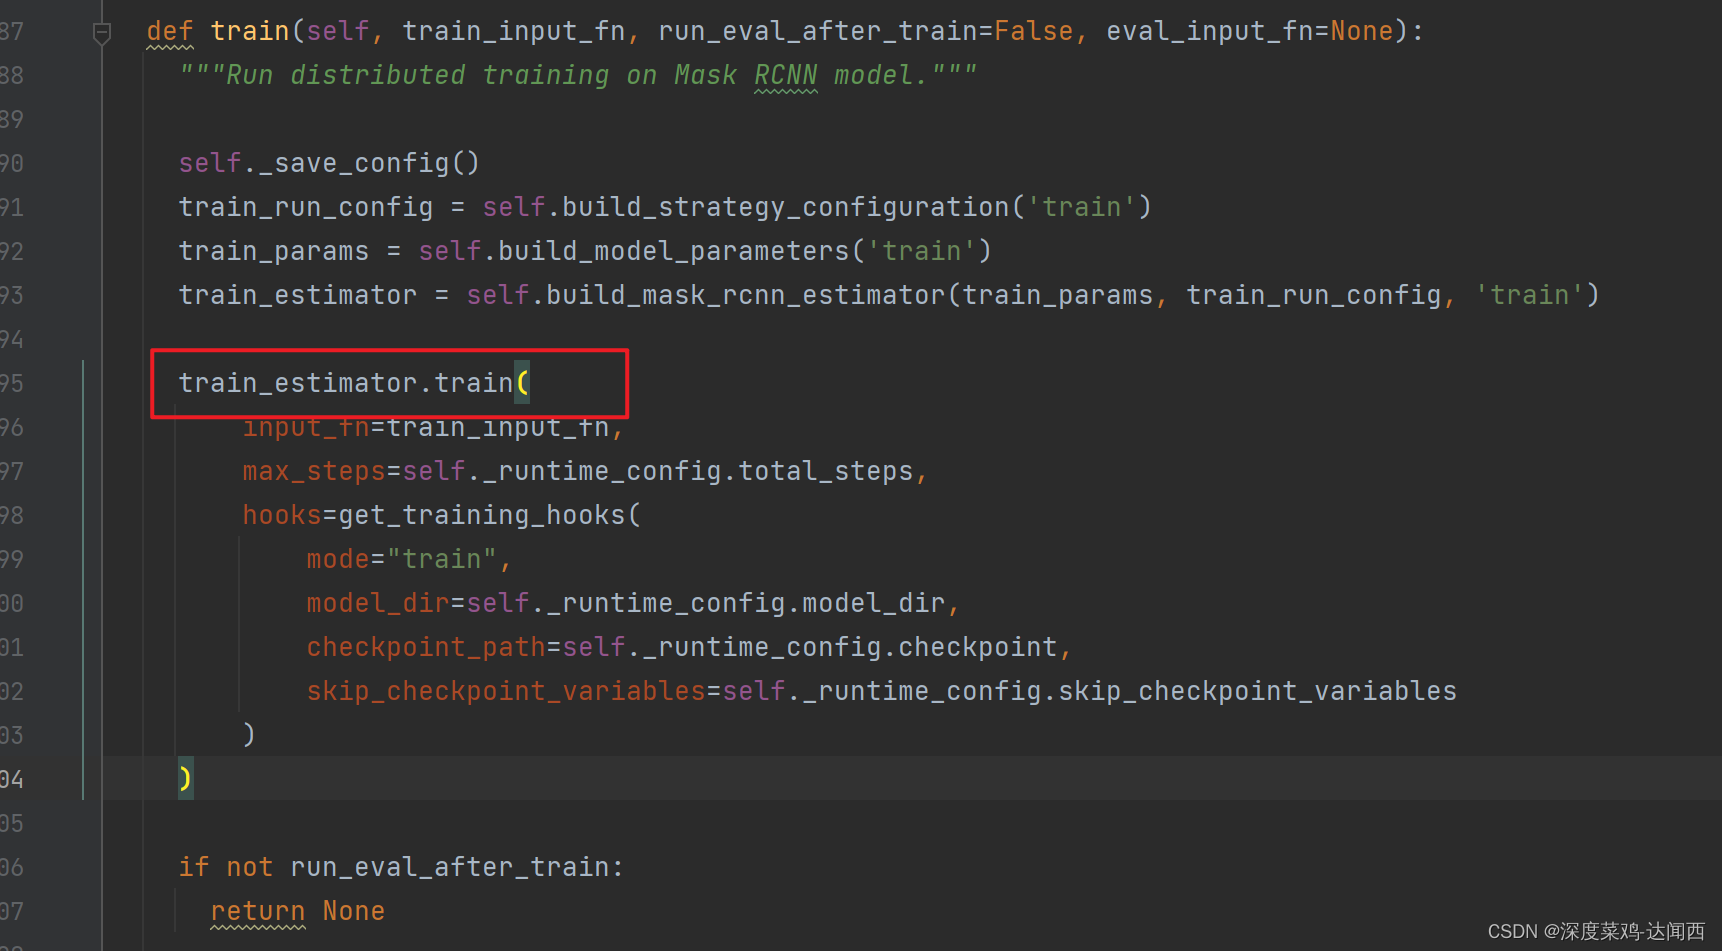
estimator.train() ( mask_rcnn 网络)
二、添加性能分析语句
2.1针对于model.fit()
tf.keras.callbacks.TensorBoard
tboard_callback=tf.keras.callbacks.TensorBoard(
                log_dir='logs', histogram_freq=0, write_graph=True,
                write_images=False, update_freq='epoch', profile_batch=2,
                embeddings_freq=0, embeddings_metadata=None, **kwargs
                ) ## 加入该语句
model.fit(myGene,steps_per_epoch=300,epochs=1,callbacks=[model_checkpoint,tboard_callback]) ##  callbacks列表加入刚才的 tboard_callback
log_dir:保存TensorBoard要解析的日志文件的目录路径。
histogram_freq:默认为0。计算模型各层的激活值和权重直方图的频率(以epoch计)。如果设置为0,将不会计算直方图。若想直方图可视化,必须指定验证数据(或分割验证集)。
write_graph:默认为True。是否在TensorBoard中可视化图像。当设置为True时,日志文件会变得非常大。
write_images:默认为False。是否在 TensorBoard 中将模型权重以图片可视化。
update_freq:‘batch’或’epoch’或整数。使用’batch’时,在每个batch后将损失和评估值写入TensorBoard。这同样适用’epoch’。如果使用整数,比方说1000,回调将会在每1000个样本后将评估值和损失写入TensorBoard。请注意,过于频繁地写入TensorBoard会降低您的训练速度。
profile_batch:默认为2。每过多少个batch分析一次Profile。profile_batch必须是非负整数或整数的元组。一对正整数表示要进入Profile的batch的范围。设置profile_batch=0会禁用Profile分析
embeddings_freq:被选中的嵌入层会被保存的频率(在训练轮中)。如果设置为0,则不会可视化嵌入。
embeddings_metadata:一个字典,对应层的名字到保存有这个嵌入层元数据文件的名字。 查看 详情 关于元数据的数据格式。 以防同样的元数据被用于所用的嵌入层,字符串可以被传入。
2.2 针对于estimator.train()
tf.estimator.ProfilerHook()
tf.estimator.ProfilerHook(
    save_steps=None,
    save_secs=None,
    output_dir='',
    show_dataflow=True,
    show_memory=False
)
save_steps int ,每N步保存一次配置文件跟踪。应该设置 save_secs 和 save_steps 之一。
save_secs int 或 float ,每N秒保存一次配置文件跟踪。
output_dir string ,将概要文件跟踪保存到的目录。默认为当前目录。
show_dataflow bool (如果为True),将流量事件添加到连接张量的生产者和消费者的迹线中。
show_memory bool ,如果为True,则将对象快照事件添加到跟踪中,以显示张量的大小和生存期。
mask_rcnn 改动如下;
train_estimator.train(
      input_fn=train_input_fn,
      max_steps=self._runtime_config.total_steps,
      hooks= get_training_hooks(      #加入性能分析钩子
        mode="train",
        model_dir=self._runtime_config.model_dir,
        checkpoint_path=self._runtime_config.checkpoint,
        skip_checkpoint_variables=self._runtime_config.skip_checkpoint_variables
      )
    )

def get_training_hooks(mode, model_dir, checkpoint_path=None, skip_checkpoint_variables=None):

    assert mode in ('train', 'eval')

    training_hooks = [
        AutoLoggingHook(
            # log_every_n_steps=RUNNING_CONFIG.display_step,
            log_every_n_steps=5 if "NGC_JOB_ID" not in os.environ else 100,
            # warmup_steps=RUNNING_CONFIG.warmup_steps,
            warmup_steps=100,
            is_training=True
        )
    ]

    if not MPI_is_distributed() or MPI_rank() == 0:
        training_hooks.append(PretrainedWeightsLoadingHook(
            prefix="resnet50/",
            checkpoint_path=checkpoint_path,
            skip_variables_regex=skip_checkpoint_variables
        ))

    if MPI_is_distributed() and mode == "train":
        training_hooks.append(hvd.BroadcastGlobalVariablesHook(root_rank=0))

    if not MPI_is_distributed() or MPI_rank() == 0:
        training_hooks.append(CheckpointSaverHook(
            checkpoint_dir=model_dir,
            checkpoint_basename="model.ckpt"
        ))
    time_hook = tf.estimator.ProfilerHook(save_steps=10, output_dir='./save/models/') ###  加入钩子
    training_hooks.append(time_hook)###  加入钩子

    return training_hooks
但是,最后发现,tf.estimator.ProfilerHook方法只能生成timeline,利用chrome://tracing/ 看到调用关系, 无法看到 op耗时多少。
2.2.1 with tf.profiler.experimental.Profile(‘logdir’,options=options):
options = tf.profiler.experimental.ProfilerOptions(host_tracer_level = 2,python_tracer_level = 0,device_tracer_level = 1)
with tf.profiler.experimental.Profile('logdir',options=options):
    executer.train(
          train_input_fn=train_input_fn,
          run_eval_after_train=FLAGS.eval_after_training,
          eval_input_fn=eval_input_fn
            )
- tf.profiler.experimental.ProfilerOptions( host_tracer_level=2, python_tracer_level=0, device_tracer_level=1, delay_ms=None )
host_tracer_level :调整 CPU 跟踪级别。值为:1 - 仅关键信息,2 - 信息,3 - 详细。[默认值为 2]
python_tracer_level :切换 Python 函数调用的跟踪。值为:1
启用,0-禁用[默认值为0]
device_tracer_level :调整设备(TPU/GPU)跟踪级别。值为:1 - 启用,0 - 禁用 [默认值为 1]
delay_ms :请求所有主机在与当前时间相距 delay_ms 的时间戳处开始分析。 delay_ms 以毫秒为单位。如果为零,则每个主机将在收到请求后立即开始分析。默认值为 None,允许分析器猜测最佳值
2、剖析将在进入作用域时开始,退出作用域时停止并将结果保存到logdir。打开TensorBoard profile标签查看结果。
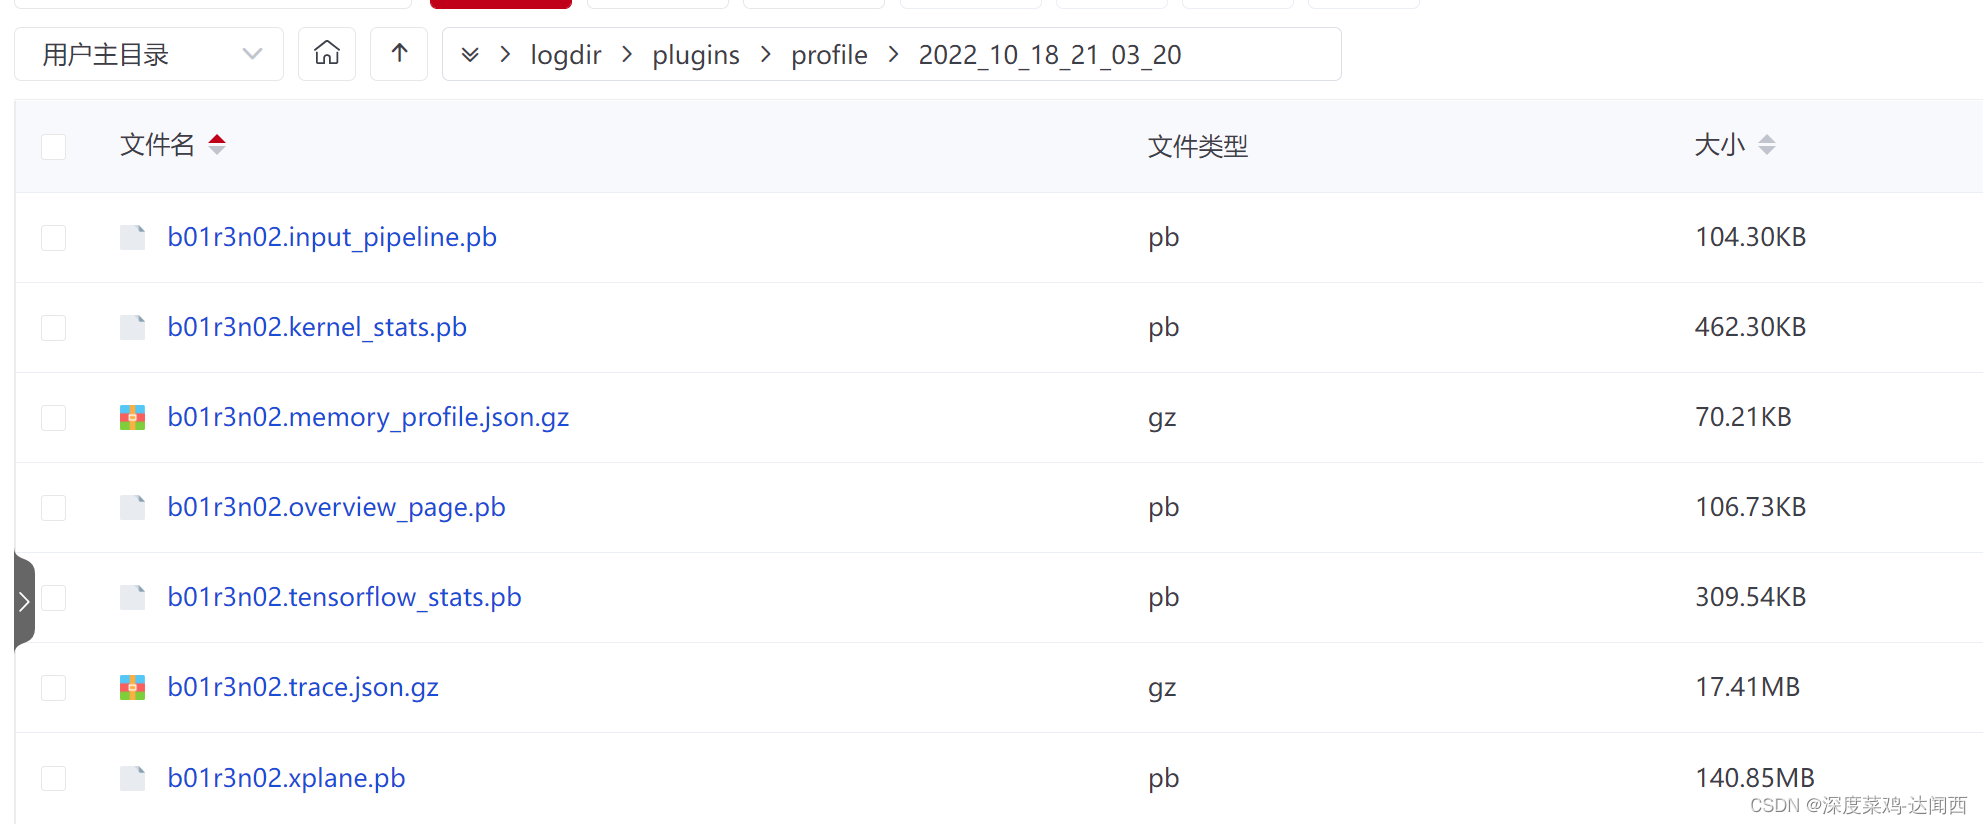 然后,将输出的日志保存到本地,用虚拟环境 tensorboard --logdir=logs 。
三、tensorboard 分析输出日志
可以去下边的官网了解tensorboard的分析方法。
使用 Profiler 优化 TensorFlow 性能 | TensorFlow Core (google.cn)
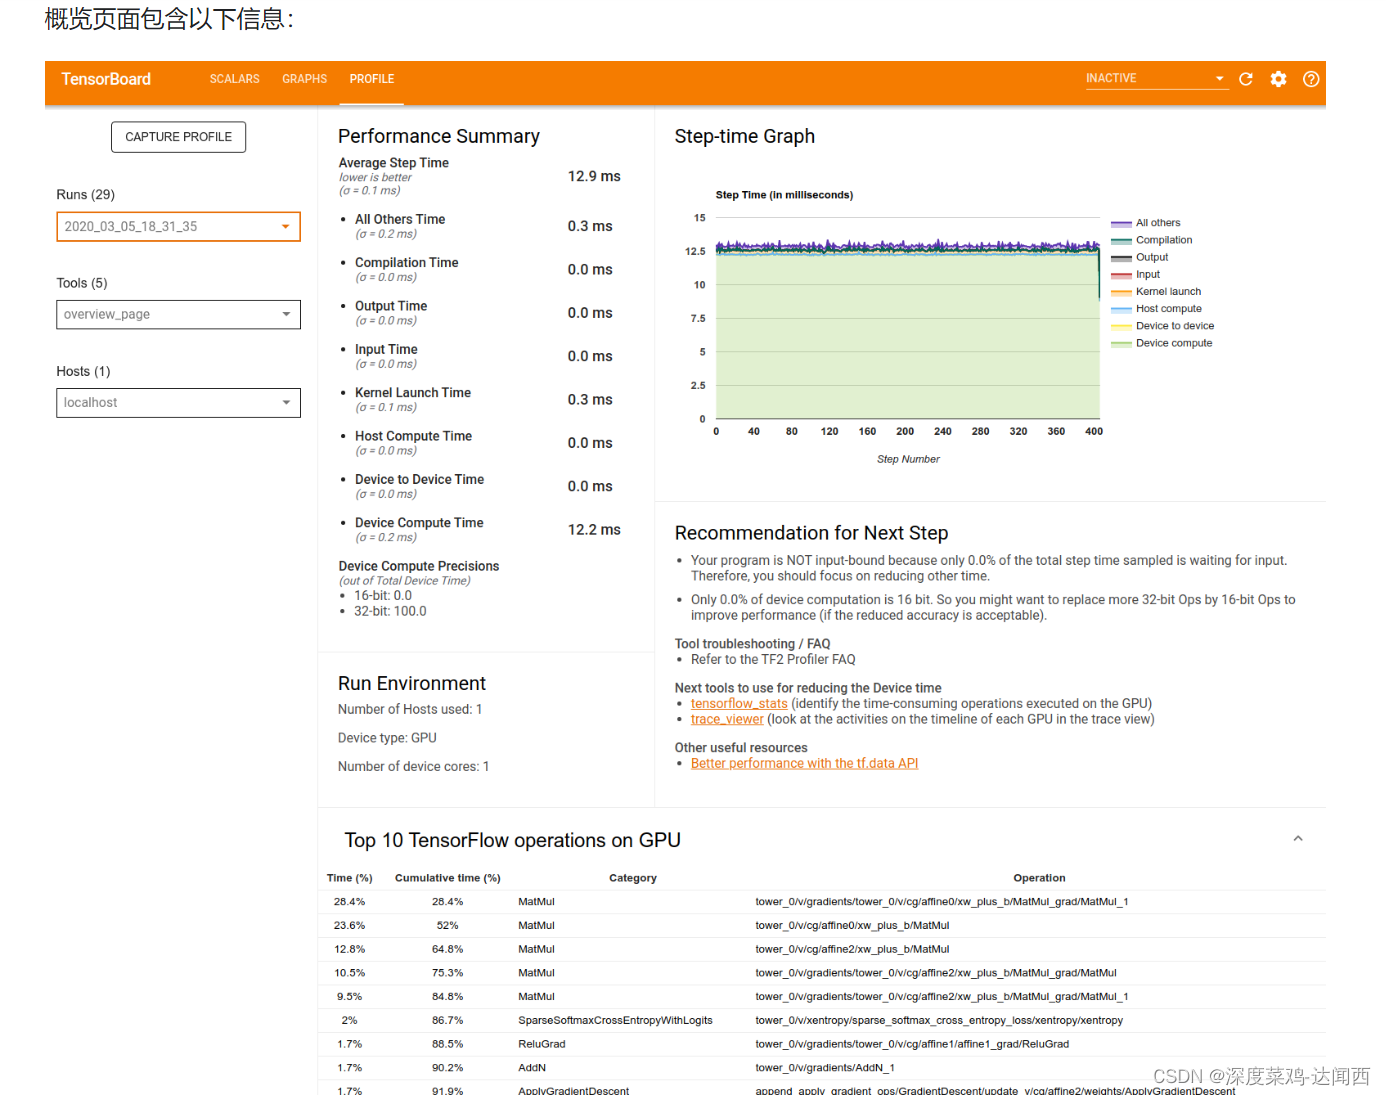
主要看这个界面:profile。使用 Profiler 优化 TensorFlow 性能 | TensorFlow Core (google.cn)
Tools里边的工具:
第一个:(1)Overview page
概览页面提供了您的模型在性能剖析运行期间表现的顶级视图。该页面会向您显示主机和所有设备的汇总概览信息,以及一些提升模型训练性能的建议。您还可以在 Host 下拉列表中选择各个主机。
第一点: Performance Summay
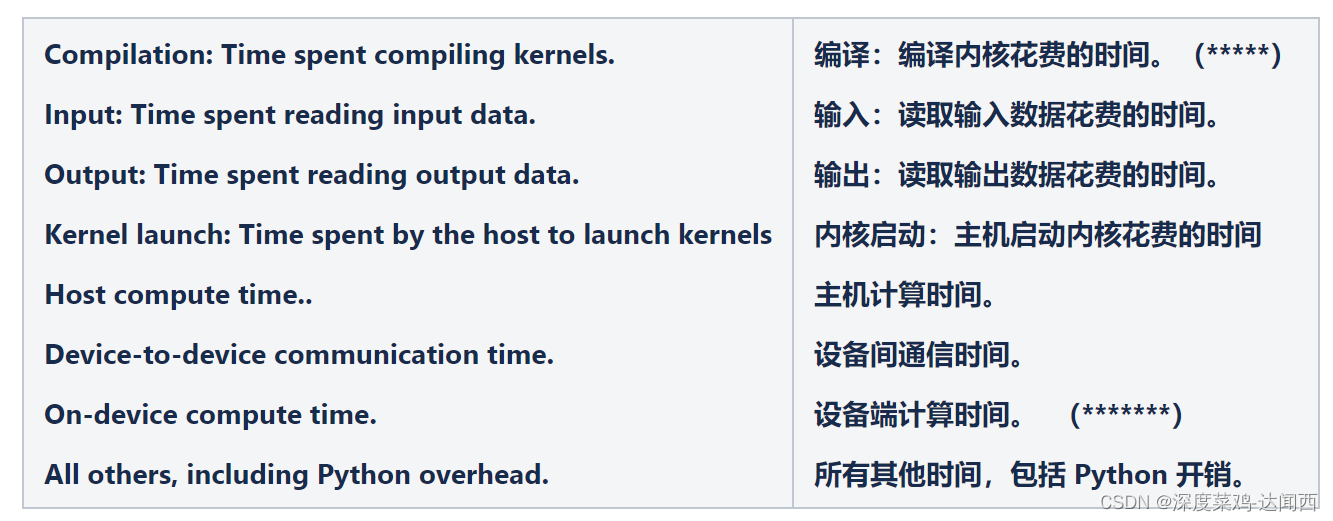
(2) TensorFlow stats
TensorFlow operations 该表会报告 TensorFlow 运算的数据,其中每个运算占据一行,每种数据类型为一列(点击列标题可对列进行排序)。
点击上部窗格右侧的 Export as CSV 按钮可将此表中的数据导出为 CSV 文件.。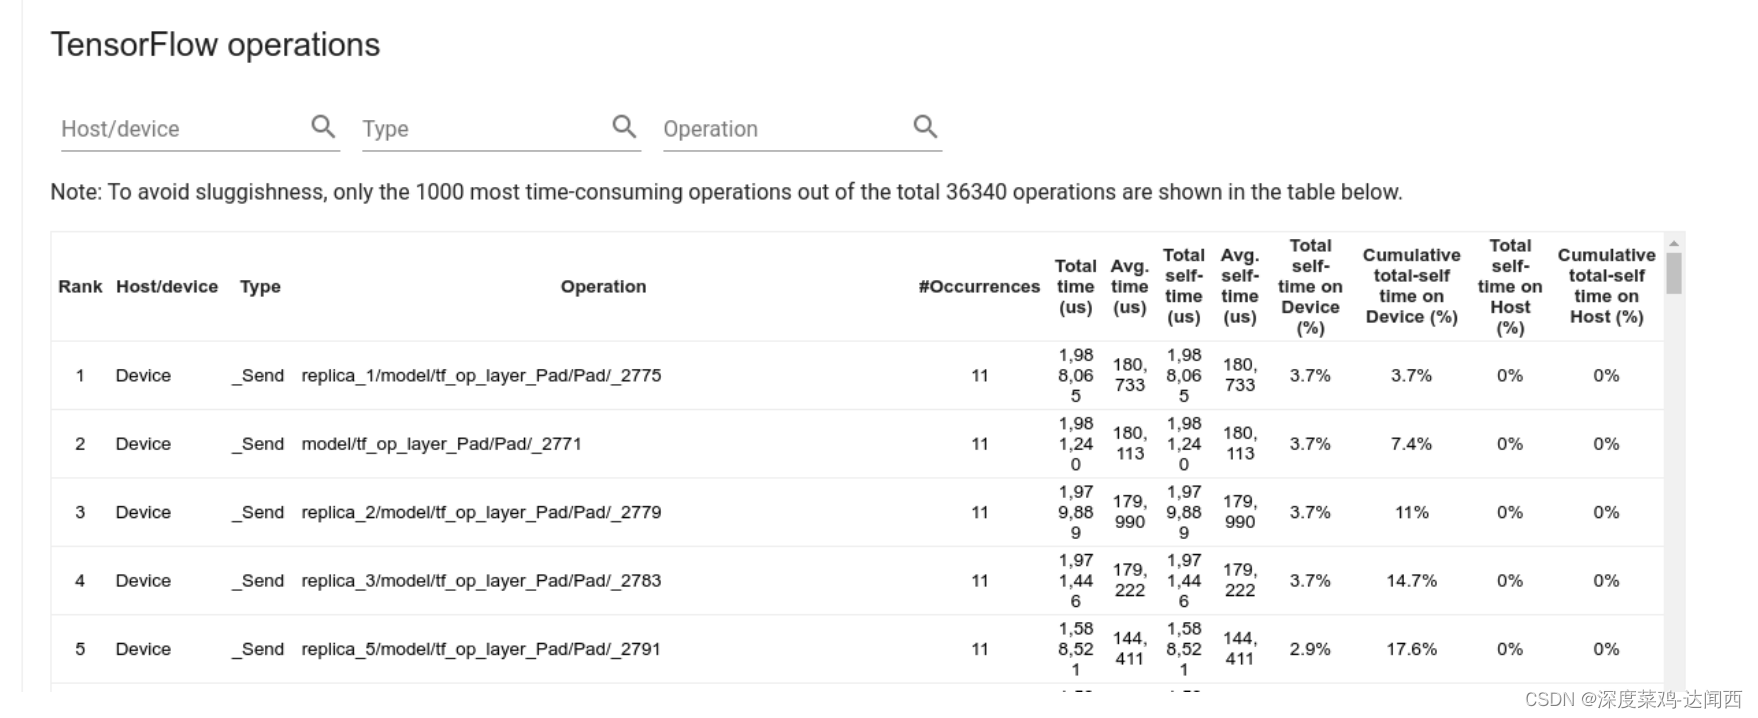
The total “accumulated” time of an op includes the time spent inside the child ops. (包含子算子)
The total “self” time of an op does not include the time spent inside the child ops. (不包含子算子)
如果op有child op,则accumulated time包含child op的耗时;而self不包含child op的耗时。
如果op运行在host上,则该op在device上的相关耗时统计都为0
如果op运行在device上,则该 op在host上的相关耗时统计都为0
您可以在上述饼图和表格中选择是否考虑或不考虑idle time。
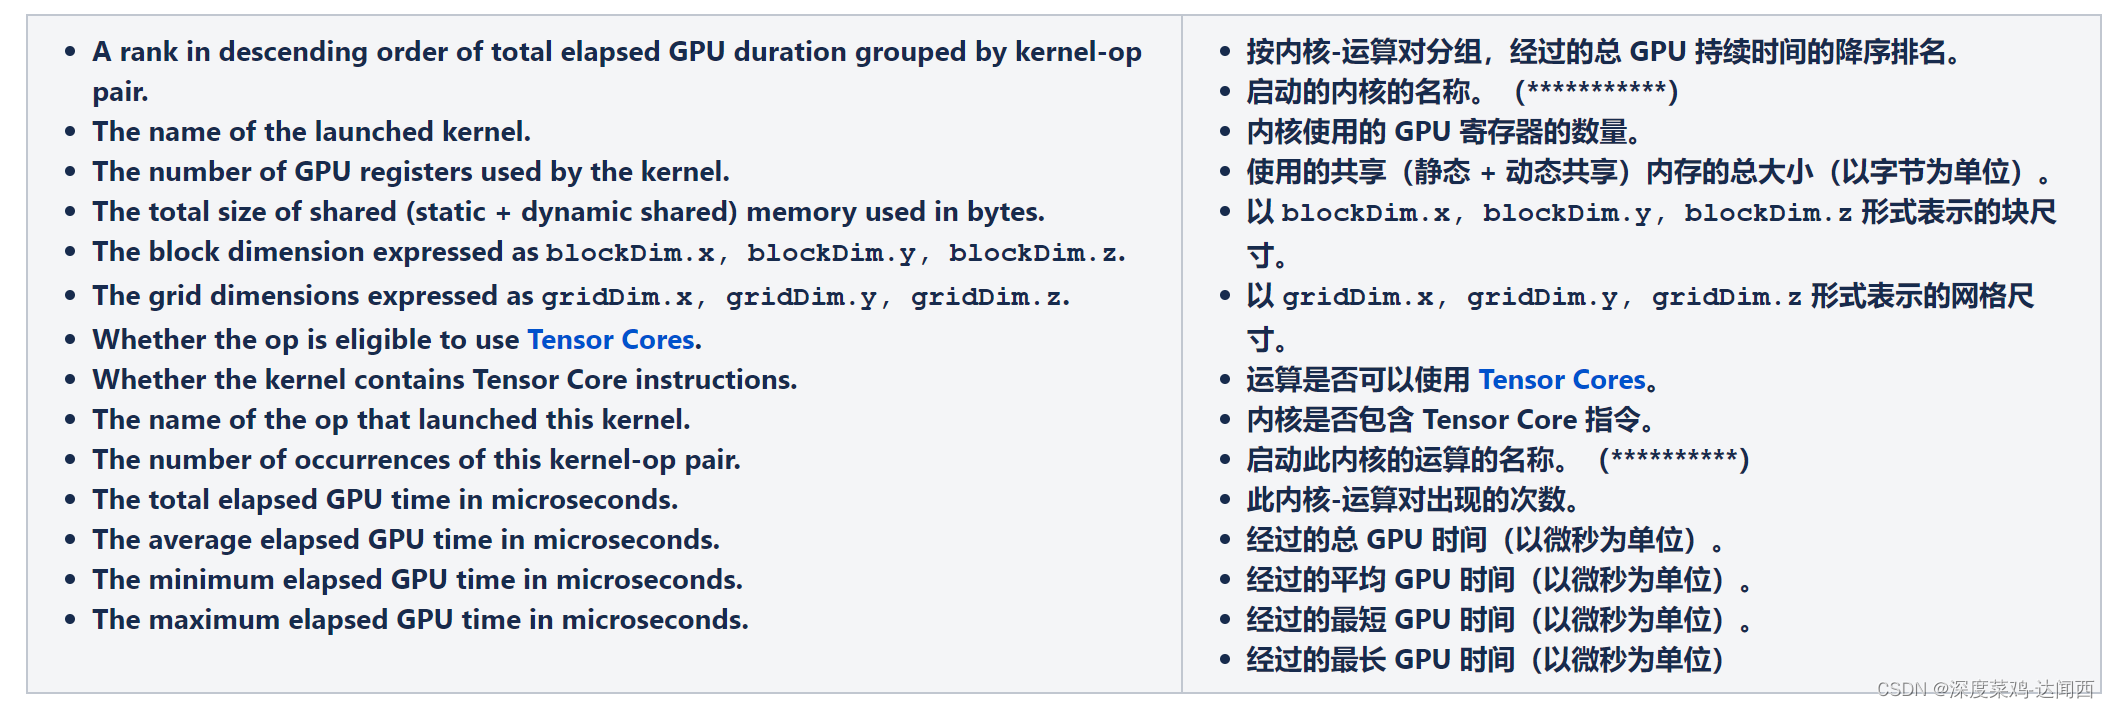
(3) GPU kernel stats

