VSCode连GitHub的代理服务器配置和获取历史版本命令
1. 在VSCode中配置代理:
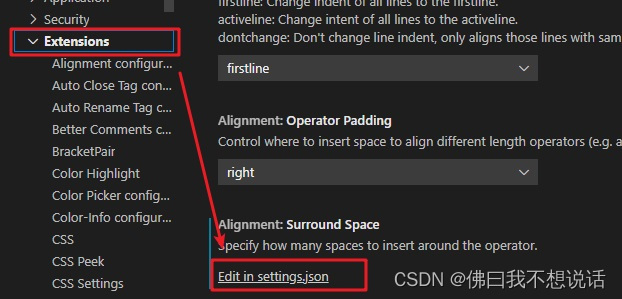
在设置中查找“Proxy”直接编辑配置文件。或者在如下菜单中点击打开配置文件

在配置文件中添加如下两条。注意http和https的代理都要配置上
"http.proxy": "http://192.168.8.*:8080",
"https.proxy": "http://192.168.8.*:8080",
"http.proxyAuthorization": null
2. 配置git代理
- 安装git,再打开git bash,
- 通过cd命令进入到准备存放git文件的工作文件夹。
- git init 初始化git目录
- 配置邮箱$ git config --global user.name "***@email.com"
- 配置用户名$ git config --global user.name "****"
- 配置http代理$ git config http.proxy http://192.168.8.*:8080
- 配置https代理$ git config https.proxy http://192.168.8.*:8080
- 使用git clone https://github.com/getdc/***.git 即可拉取文件
3. 在VScode中安装Git History插件。
- 可以查看项目的历史版本
- 在选定的版本中点copy hash to clipboard,如下图

- 在git bash中使用 $ git checkout fae***** 即可获取历史版本
